So, you’re thinking about tackling a Mini Cooper gearbox replacement yourself? It sounds like a big job, and honestly, it is. But with the right info and a bit of patience, it’s totally doable. We’re going to break down the whole process, from figuring out what’s wrong with your current gearbox to getting a new one bolted in and ready to go. Think of this as your roadmap to getting your Mini back on the road and shifting smoothly.
Key Takeaways
- Before you start a Mini Cooper gearbox replacement, get familiar with common gearbox issues and how your specific Mini’s gearbox works.
- Gather all the necessary tools and parts, like a proper socket set and a new gearbox kit, and do a quick check of everything before you begin.
- Removing the old gearbox involves draining fluid, disconnecting axles, and often lowering the subframe. Take your time and work safely.
- Installing the new gearbox means prepping it, carefully mounting it, and reconnecting all the bits like axles and mounts.
- After the swap, refill the transmission fluid, test everything out, and do a final check of bolts and a test drive to make sure it’s all good.
Understanding Your Mini Cooper Gearbox
So, you’re diving into the world of Mini Cooper gearboxes. It’s a pretty neat piece of engineering, really. The way they tucked the gearbox right under the engine was a stroke of genius from Alec Issigonis, saving a ton of space. But like any mechanical part, they can run into issues. Knowing what to look for and how they work is half the battle when it comes to keeping your Mini running smoothly.
Common Mini Cooper Gearbox Problems
Gearboxes can develop a few common quirks over time. You might notice things like difficulty shifting gears, especially into first, or maybe some grinding noises. Sometimes, leaks can pop up, which is never a good sign. Worn-out synchros are a frequent culprit for shifting problems, and don’t forget about the potential for bearing wear, which can lead to all sorts of unpleasant sounds and vibrations. It’s not uncommon for the clutch mechanism to need attention too, as that’s directly tied into the gearbox’s operation.
How Mini Cooper Gearboxes Work
At its core, a gearbox is all about managing the power from your engine and sending it to the wheels. It uses a set of gears to change the speed and torque. Lower gears give you more power for starting off or climbing hills, while higher gears let you cruise efficiently at speed. The Mini’s gearbox is a compact unit, with the gears and differential all housed together. The selector forks, moved by the gear lever linkage, engage different gear sets to change ratios. It’s a clever, integrated system.
Identifying Your Mini Cooper Gearbox Type
Figuring out which gearbox your Mini has is pretty straightforward once you know what to look for. The main differences come down to the shift mechanism. Early Minis used a ‘remote’ shift, where the gear lever connected to the gearbox via rods and linkages. Later models switched to a ‘rod-change’ system, which is more direct and generally feels a bit tighter. You’ll also want to know about the final drive ratio, as this affects how the car accelerates and cruises. Checking your car’s manual or looking for identifying marks on the gearbox itself can help you pinpoint the exact type.
Preparing for Your Mini Cooper Gearbox Replacement
Getting ready to swap out your Mini Cooper’s gearbox is a big job, no doubt about it. But with the right prep, it’s totally doable. First off, you’ll need a solid set of tools. Think about a good socket set, including those often-forgotten Torx bits, and definitely a torque wrench. You’ll also want some jack stands, a floor jack, and maybe a transmission jack to help lower and raise the heavy gearbox safely. Don’t forget safety glasses and gloves – grease happens.
Essential Tools for Gearbox Replacement
Gathering the right parts is just as important. You’ll need your replacement gearbox, of course, but also consider a new clutch kit if yours is due for replacement, new transmission fluid (check your Mini’s manual for the specific type and amount), and possibly new axle seals and gaskets. It’s always better to have a few extra bits on hand than to be stuck halfway through the job.
Gathering Necessary Parts and Kits
Before you even think about unbolting anything, give your Mini a once-over. Make sure the car is stable on its jack stands. Check that you have enough space to work around the car and that the replacement gearbox is ready to go. It’s also a good idea to disconnect the battery to avoid any electrical mishaps. Seriously, double-checking everything now saves a lot of headaches later.
Pre-Replacement Checks and Preparations
It’s easy to get caught up in the excitement of the actual swap, but taking the time to gather all your tools and parts, and doing a thorough pre-job inspection, will make the entire process smoother and safer. Think of it as laying the groundwork for success.
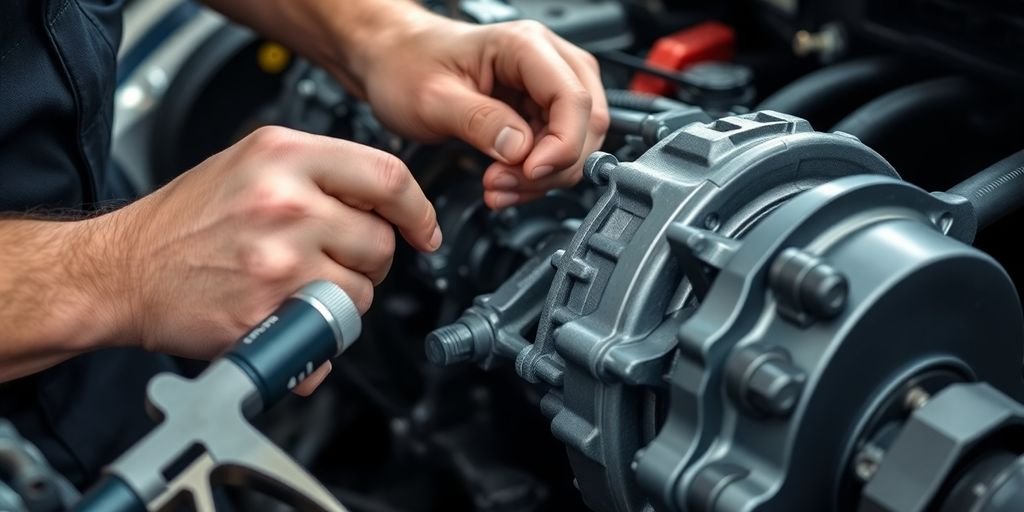
Step-by-Step Mini Cooper Gearbox Removal
Alright, let’s get down to business with removing the gearbox. This is where things start to feel like a real project. First things first, you’ll need to tackle the axle shafts. On each wheel hub, there’s a big 32mm nut holding the axle in place. You’ll see a little tab on the nut that locks into the axle; use a flathead screwdriver to pry that tab up. Don’t sweat damaging the nut, because you’ll be putting a new one on anyway. Getting these nuts off can be tough; they’re usually torqued down pretty hard, often over 200 ft-lbs. An impact wrench makes this part much easier, but if you don’t have one, you might need a long breaker bar and do it while the car is still on the ground with the wheels on. Once the nut is off, you’ll need a puller to push the axle shaft out of the wheel bearing. Some folks just pop the inner CV joint out of the gearbox and twist the whole axle assembly out of the way, but honestly, that puts a lot of strain on the joints. It’s better to fully remove them if you can.
Disconnecting Axles and Draining Transmission Fluid
Before you can even think about pulling the gearbox, you’ve got to get the axles out of the way and drain out all that old transmission fluid. You’ll find a large 32mm nut on the end of each axle shaft where it connects to the wheel hub. Look for a small locking tab on this nut; you’ll need to pry this up with a screwdriver. It’s okay if you damage the nut, as you’ll be replacing it later. These nuts are usually on there tight, often torqued to over 200 ft-lbs, so an impact wrench is a big help here. If you don’t have one, you might need a long breaker bar and the car’s weight on the ground to break it loose. After the nut is off, use a puller tool to push the axle shaft out of the wheel bearing. Once the axles are free, locate the drain plug on the bottom of the gearbox and let all the old fluid drip out into a suitable container. Make sure you have a pan big enough to catch it all.
Removing the Front Subframe and Bumper Assembly
With the axles dealt with and the fluid drained, the next big step is to get the front bumper and subframe out of the way. This gives you the much-needed clearance to actually maneuver the gearbox out of the car. You’ll need to disconnect the starter motor before you start messing with the subframe, as you’ll be working right around it. Removing the front bumper usually involves undoing several bolts and clips, and the subframe is bolted to the chassis in a few key places. It’s a good idea to support the engine from above before you unbolt the subframe, as it carries a lot of the front-end weight. Take your time with this part; it can be a bit fiddly.
Safely Extracting the Old Gearbox
Now for the main event: getting the old gearbox out. You’ll need to support the engine properly, usually with an engine support beam from above or a jack stand under the oil pan (with a block of wood to protect it). Make sure the car is securely supported on jack stands. You’ll need to unbolt the gearbox from the engine block, and there are usually several bolts holding it in place. Don’t forget to disconnect any electrical connectors, clutch slave cylinder lines, and shifter linkages attached to the gearbox. Once everything is unbolted and disconnected, you can carefully lower the gearbox using a transmission jack. It’s heavy, so be prepared and make sure the jack is stable. Lower it slowly and steadily, keeping an eye out for anything that might still be snagged.
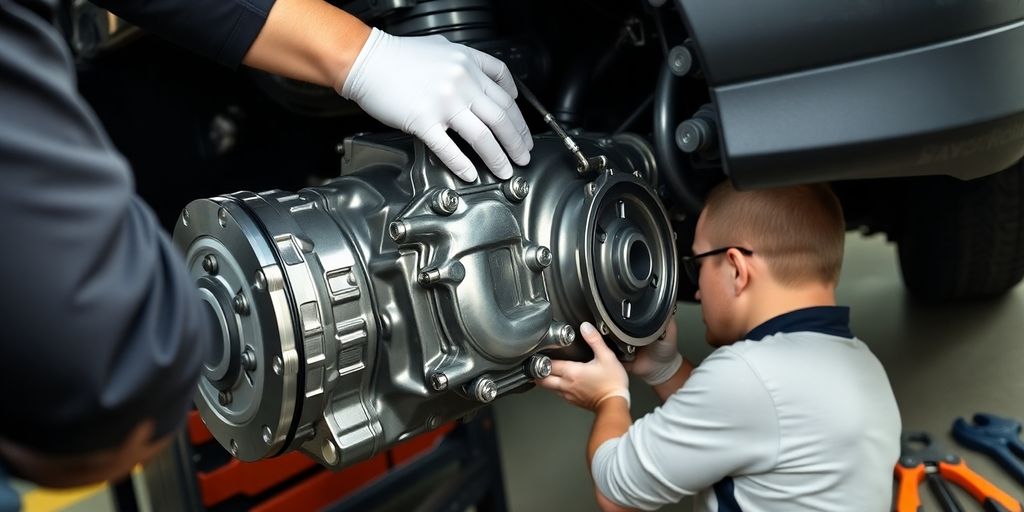
Installing the New Mini Cooper Gearbox
Now that you’ve got the old gearbox out, it’s time to get the new one in. This is where things start to feel like progress. You’ve done the hard part, and this section is all about putting it all back together correctly.
Preparing the Replacement Gearbox
Before you even think about lifting the new gearbox into place, give it a once-over. Make sure it’s clean, and check that all the necessary seals and gaskets are in place. If your replacement unit didn’t come with fresh transmission fluid, now’s the time to get that ready. Some people like to pre-fill the gearbox with a bit of fluid to help with lubrication on the initial startup, which is a good idea. Also, double-check that any linkages or sensors that need to be transferred from the old gearbox to the new one are accounted for and in good condition.
Mounting the New Gearbox
This is definitely a two-person job, or at least requires a good transmission jack. Carefully maneuver the new gearbox into position. You’ll need to align the input shaft with the clutch splines. It can be a bit fiddly, so take your time. Don’t force it. If it’s not going in smoothly, something is likely out of alignment. Wiggle it gently, check the alignment again, and try again. Once it’s seated against the engine block, start threading in the mounting bolts. Get a few in by hand to hold it in place before you start tightening them. Tighten these bolts evenly in a crisscross pattern to ensure the gearbox sits flush against the engine.
Reconnecting Axles and Essential Components
With the gearbox securely mounted, you can start reconnecting everything else. This means getting the drive axles back into their respective hubs and securing them. Reattach any brackets, mounts, or lines that were removed during the disassembly. Make sure all electrical connectors are plugged back in securely. It’s also a good time to re-check that you haven’t left any tools or stray parts in the engine bay or around the gearbox area. You don’t want anything getting caught in the moving parts later on.
Post-Replacement Procedures and Checks
Alright, you’ve wrestled the new gearbox into place and reconnected everything. That’s a huge win! But we’re not quite done yet. It’s time to make sure everything is buttoned up correctly and that your Mini Cooper is ready to roll without any funny noises or issues. This is where we double-check our work and give it a proper test drive.
Refilling Transmission Fluid
First things first, let’s get some fresh gear oil in there. You’ll want to use the specific type recommended for your Mini Cooper’s gearbox – using the wrong stuff can cause all sorts of problems, like grinding noises or even damage. Check your owner’s manual or a reliable parts supplier for the exact specification. You’ll typically fill it until the fluid just starts to come out of the fill plug hole. Make sure the car is level when you do this. It’s a good idea to have a drain pan ready, just in case.
Testing Gearbox Functionality
Before you even think about hitting the road, let’s test things out while the car is still safely supported. With the wheels off the ground, start the engine and carefully try shifting through all the gears. Listen for any unusual sounds like grinding or whining. Make sure the clutch engages and disengages smoothly. You should be able to shift into each gear without excessive force. If something feels off, now is the time to investigate before putting weight back on the wheels.
Final Torque Checks and Road Testing
Once you’re confident the gearbox is functioning correctly, it’s time for the final checks. Go back over all the bolts you touched during the replacement, especially the gearbox mounting bolts and axle nuts, and make sure they’re torqued to the manufacturer’s specifications. This is super important for safety. Then, carefully lower the car. Start the engine again and take it for a gentle test drive. Pay attention to how the car shifts, accelerates, and brakes. Listen for any new noises. Gradually increase the intensity of your driving, but if anything feels wrong, pull over safely and re-check your work. It might take a few miles for everything to fully settle in, so keep an ear out for any changes.
Remember, taking your time with these final checks can save you a lot of headaches down the road. It’s better to be safe than sorry when it comes to your Mini’s drivetrain.
Optimizing Your Mini Cooper’s Drivetrain
So, you’ve gone through the whole process of replacing your Mini Cooper’s gearbox. That’s a big job, and you should be proud. But now, what’s next? It’s a good time to think about how the gearbox interacts with the rest of your car’s drivetrain. Making some smart choices here can really change how your Mini feels on the road, whether you’re just cruising around town or pushing it a bit harder.
Exploring Final Drive Ratio Options
Think about the final drive ratio. This is basically the number of times the engine has to turn for the wheels to turn once. A lower number, like 3.44:1, means the engine turns more for each wheel rotation. This usually gives you quicker acceleration but means the engine will be spinning faster at highway speeds, which can increase fuel use and noise. A higher number, like 3.10:1, does the opposite – it’s better for highway cruising, giving you lower RPMs and better fuel economy, but acceleration won’t feel as punchy. Choosing the right ratio depends on what you mostly use your Mini for. If you do a lot of city driving and want that snappy feel, a lower ratio might be good. If you take it on longer trips, a higher ratio could be more comfortable.
Considering Performance Upgrades
Beyond just the ratio, there are other ways to tweak your drivetrain. A limited-slip differential (LSD) is a popular upgrade. Unlike a standard open differential that sends power to the wheel with the least traction (often leading to one wheel spinning uselessly), an LSD directs more power to the wheel that has grip. This means better traction, especially when cornering or accelerating out of turns. Brands like Quaife offer torque-biasing differentials that work automatically to send power where it’s needed. It’s a noticeable improvement for spirited driving. You might also look into different gearbox oil types. Some synthetic oils can offer better lubrication and temperature resistance, potentially leading to smoother shifts and longer gearbox life.
Maintaining Your Mini Cooper Gearbox
No matter what you decide to do with ratios or upgrades, keeping up with maintenance is key. Regularly changing the transmission fluid is super important. The manual usually suggests a schedule, but if you drive your Mini hard or in tough conditions, you might want to do it more often. Using the correct type and amount of fluid is also critical. Check your owner’s manual for the specific recommendations for your model year. Also, listen for any unusual noises or feel for odd vibrations when shifting or driving. Catching small issues early can prevent much bigger, more expensive problems down the road. A well-maintained gearbox, whether stock or modified, will serve you better for longer.
Sometimes, people overlook the simple stuff. Making sure the gearbox mounts are in good shape, for instance, can reduce vibrations and keep everything aligned properly. It’s not as exciting as a new differential, but it matters.
Wrapping It Up
So, you’ve gone and done it. You tackled the Mini Cooper gearbox replacement, and hopefully, your car is running smoother than ever. It’s not the easiest job out there, for sure, but seeing it through yourself feels pretty good, right? Remember, taking care of your Mini is a journey, and this was a big step. If you ran into any snags or just want to double-check your work, don’t hesitate to look back at the steps or consult with someone who knows these cars well. Happy driving!